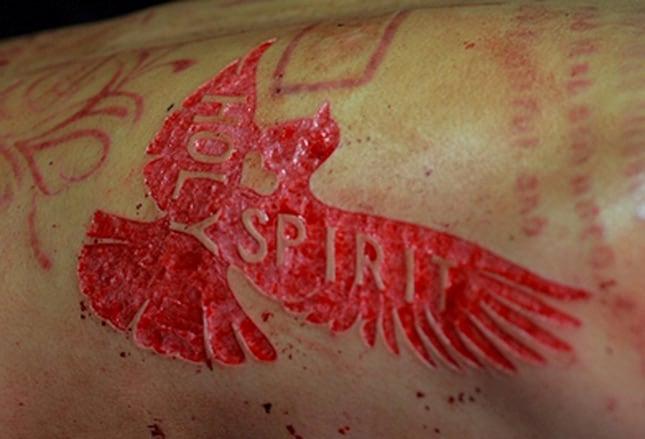
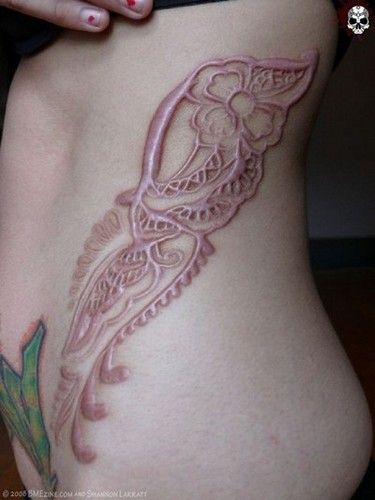
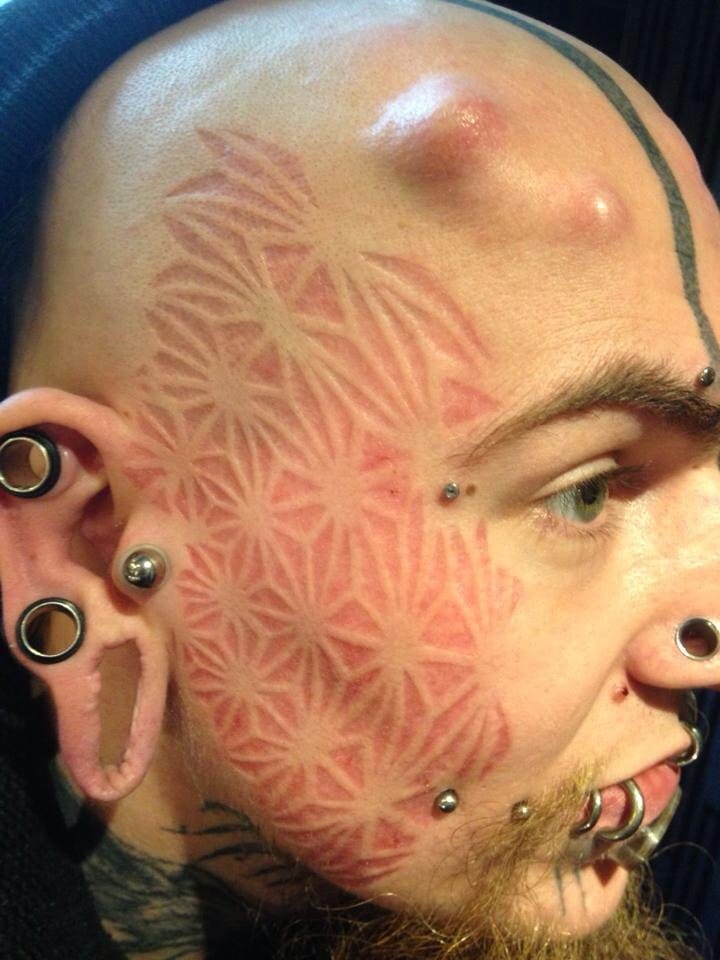
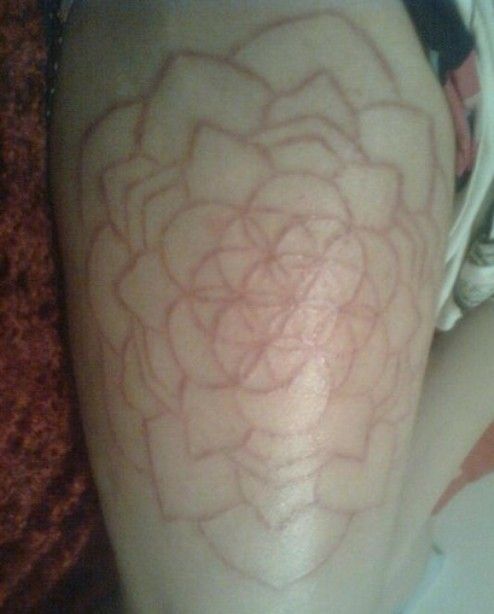
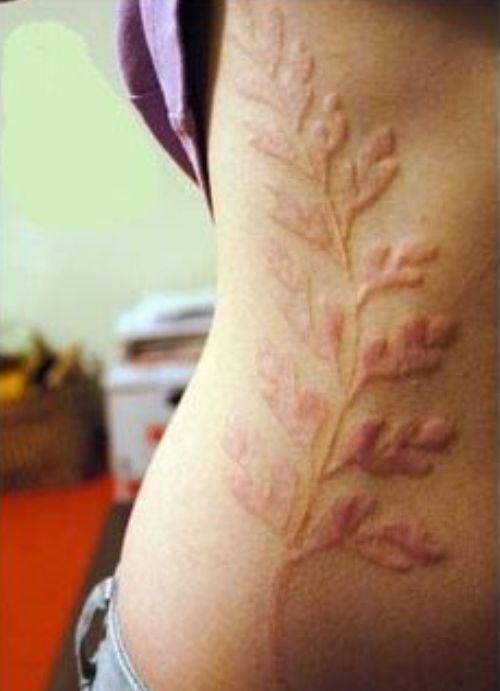
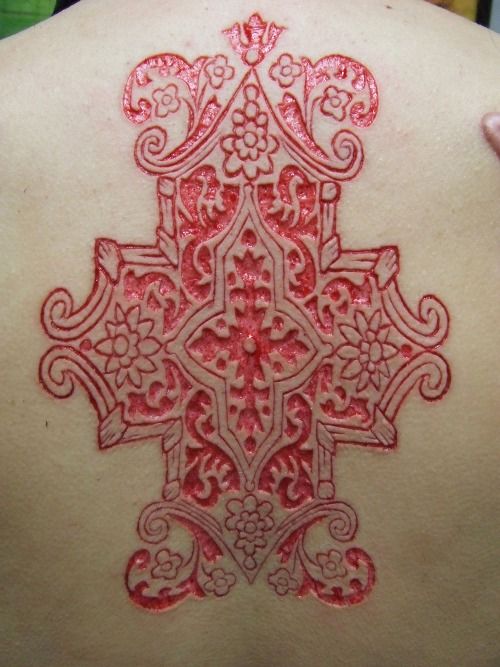
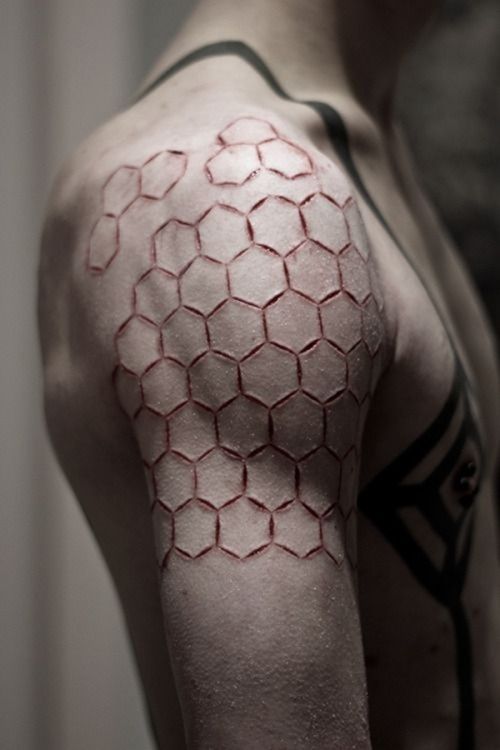
Scarification is a process of permanently altering the texture of skin by cutting through sheets of skin to create a scar on purpose. A mixture of techniques can be employed, including cutting, scratching, and burning.
There is a deep history to this tradition dating back to West African history where incisions are made—either by cutting or branding—to communicate cultural expressions through permanent scars. According to tradition, scarification signified a person’s identity, including a person’s position within their community, an adult’s passage into adulthood, or a connection to a tribe. In other words, the idea came from the desire to save the human body from painful tattoos rather than wanting to harm it.
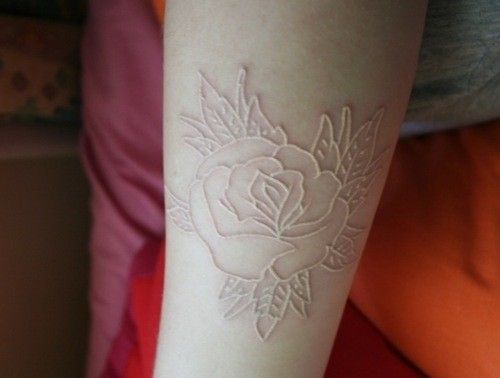
In scarification, the skin is opened up so that skin tissue can grow along the drawn lines. Its lighter color is because it is damaged skin that tends to grow back lighter so that it will contrast with darker skin tones. Also, it was common to irritate healing scars even further by rubbing them to leave a more distinct scar.
We will learn everything about scarification as a body modification and what should be taken care of when we do it. Thousands of people use this method every year, so you should learn everything you need to about it before you attempt it. If you would like to discuss this process in more depth, we strongly suggest that you make an appointment with your doctor.
Reasons of Scarification
Contents (Click to Jump)
Anthropologists have debated long and hard about what constitutes a boundary. Introducing rites of passage into his description of tattooing, scarification, and painting in 1909, Van Gennep described these transformations as rituals of passage. Levi-Strauss described the body in 1963 as an imprinted surface that is waiting for the culture to imprint. Turner (1980) first introduced the term “social skin” in his analysis of how Kayapo culture was constructed and expressed through the individual body. An important theme in anthropology that has been present since its inception is that of boundaries between the individual and society, between societies, and between representation and experience.
The behavior ecology of scarification is currently based on four competing hypotheses: (1) a rite of passage, (2) a traumatizing procedure, (3) a sexually selected character that is devoid of adaptive traits, or (4) an adaptive pathogen-induced selection process. Additionally, scarification may also be motivated by aesthetic, religious, or social factors. Scarification, for example, has been widely used by many West African tribes as a way to mark significant life events, such as the puberty and marriage of girls and women. Women who have to scar on their abdomen may denote a willingness to be mothers. This is because their ability to deal with the pain of scars indicates they are emotionally mature and ready to become mothers. The use of permanent body markings is also used to convey complex messages about identity. Permanent body markings may highlight fixed social, political, and religious roles. Papua New Guinean boys undergo scarification that resembles crocodile scales to mark their transition from childhood to manhood, a ceremony rooted in the belief that humans evolved from crocodiles. Whenever tattoos, scars, brands, and piercings are acquired voluntarily, they let people see an individual’s autobiography on their body.
Scarification is generally not included in the activities of the tribe. Members who avoid scarification often find themselves excluded from their society. A group member lacking the typical characteristics is not supposed to have full standing in their society; they are also not considered as capable of meaningful behavior, such as greeting others, commanding, and stating one’s opinion. Scarification can thus transform partial tribe members into normal states completely accepted by the group. Besides extensive and intricate greetings, scarification is a non-typical language that allows a person to communicate fully, an element that is needed to be considered a normal member of the group.
- Usually, scarification is more noticeable on darker-skinned people than on tattoos.
- During the scarification process, endorphins are released that can induce euphoria.
- Scarification is often used to demonstrate pain endurance. Young males demonstrate strength and discipline through the endurance of scarring, especially in tribes where male members play the role of hunters and warriors. A person who has had their flesh torn or cut should be less likely to fear a wild animal’s teeth or the tip of an enemy’s spear after they have experienced the sensation of torn or cut flesh.
- Among Ethiopian Suri men, scarification is used as a sign of warfare after they slay someone from an enemy tribe, whereas among Mursi women it is used to enhance their sexual experience by attracting the opposite sex. Ekoi people of Nigeria believe that scars serve as a type of currency on the journey to the afterlife.
- Sudanese tribes consider scars medically beneficial. Scars above and around the eyes are thought to improve eyesight, while scars on the temples help relieve headaches. There are groups in Northern Ghana such as the Dagomba who use scarification as a method of treating certain illnesses such as convulsions, measles, pneumonia, stomach pains, and so on. As these diseases are believed to originate in the blood, a traditional healer cuts the skin to obtain a powder or potion that is then applied directly to the wound, allowing the poison to enter the bloodstream.
- In addition to scarification, survivor status can be changed through scarification. Individuals undergo a variety of ritual death and rebirth, and they redefine the relationship between themselves and society in this way.
- There are some African tribes or ethnic groups that can be identified by their “markings” in certain regions. There are many tribes in Northern Ghana that use the markings, which include the Gonjas, Nanumbas, Dagombas, Frafras, and Mamprusis.
Scarification is a tradition among some ethnic groups in sub-Saharan Africa, such as the Gonja, Dagomba, Frafra, Mamprusi, Nanumba, Bali, Tɔfin, Bobo, Montol, Kofyar, Yoruba, and Tiv people of West Africa, and the Dinka, Nuer, Surma, Shilluk, Toposa, Moru, Bondei, Shambala, Barabaig, and Maasai people of East Africa.
Scarification Methods
Human branding and abrasion are both considered scarification procedures even though they are typically associated with surgical instruments such as scalpels and other cutting instruments. The procedures of cutting and electrosurgical branding (also known as laser branding) have become some of the most popular scarification methods in the western world, as they tend to provide the best cosmetic outcomes.
In terms of scarification methods, not every artist is adept at all of them, so if you’re interested in having a specific method of scarification performed, be sure to do your homework to find an artist who makes use of that method. In the sections below, we discuss each scarification method in detail, so that you can decide which one might suit your needs best. However, you should also consult with your chosen scarification artist to learn about the best way to implement your scarification design.
- Cutting. It is the process of carving designs into the skin using a scalpel or another sharp instrument. The procedure is not to be confused with self-mutilation, which refers to cutting for self-harm. In addition to cutting, other tools may be used to create scarification pieces. To darken scarification wounds, tattoo ink may sometimes be rubbed on. Alternatively, liquid skin adhesive can also be used to keep a wound open, allowing it to scar more deeply. The packed method is less common in western civilization as sanitation has made it difficult for the packing to be widely used. Cut scarification wounds in Africa and some other tribal cultures are often packed with clay and ash to create significant hypertrophic scarring. To enhance the image of a cut design, the skin can sometimes be peeled away; however, skinning can lead to scarifying pieces that have inconsistencies in texture. Some artists use a cutting technique known as hatching to create larger scarifications or designs that feature varied shading levels. This technique is similar to sketching—although it is done with a scalpel.
- Skin removal/skinning. A single line of cutting produces relatively thin scars, whereas skin removal provides a larger area of scar tissue. To remove the skin, the outline of the area has to be cut, and then the skin has to be peeled away. A scar left from this method usually has an inconsistent texture, though this heavily depends on the artist’s skill and the person’s aftercare.
- Packing. Traditionally, this method is used in Africa but is rare in the West. In addition to a diagonal cut, an inert material such as clay or ash is placed inside the wound during healing. Massive massive massive mass hypertrophic scarring occurs during wound healing when contaminants inserted into the wound are pushed out. In the United States, cigar ash can be used for scars that are more raised and purple; people can also use ashes from their recently deceased relatives and friends.
- Hatching. The scarification method resembles flesh removal in that it is performed by cutting into the skin with a sterile surgical scalpel. Scarring a larger area requires the use of the hatching technique, which is similar to the process for sketching. This method is easier to perform than flesh removal, and it can be performed with just one hand, which may be advantageous in some situations. Although this technique can take a while for larger pieces, it is useful, especially for smaller, more detailed pieces. In addition, shading can be applied.
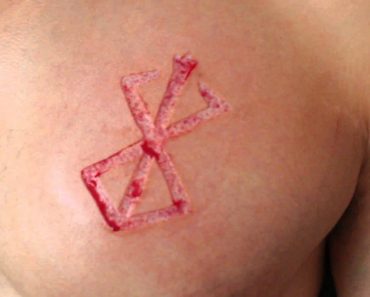
- Strike Branding. A brand is a metal piece heated on an iron that is pressed into a person’s skin to form a design, like the branding of livestock. For creating permanent body art, strike branding isn’t the best option since the scars aren’t as precise as other scarification methods. As well as spreading greatly during healing, the design can interact with the body. Curvier body parts are not recommended for this option. When choosing this method, your artist will be able to achieve better results if he or she uses multi-strike branding. Multi-strike branding involves applying heated metal to the skin in stages to create designs rather than applying an entire design at once.
- Cold Branding. This method involves the freezing of a metal object to burn a design into a person’s skin in a similar way to strike branding, but a nitrogen-based tool is used instead of a heated or flame tool to charge the iron. In contrast to strike branding, cold branding usually results in white hair growing back over the branded area. This form of branding also is less likely to cause keloids.
- Cautery Branding. This involves burning an artistic design into a person’s skin with a thermal cautery tool. Long-term results are often better with this method as opposed to single- or multi-strikes.
- Electrosurgical Branding. In essence, it is a type of burning technology that uses hand-held electrical devices that generate electric sparks that render the skin vaporous on contact. Even though there is typically no medical laser involved in the process, laser branding is often referred to as such. This method of scarification is very precise and tends to be less damaging to surrounding tissues than traditional scarification, resulting in a quicker and less painful recovery process.
- Abrasion. This is the process of creating scars by abrading the skin in layers with another device, like sandpaper or an inkless tattoo machine.
- Moxabustion. Using corrosive chemicals, removes skin and leaves scars. It consists of placing incense on the skin and allowing it to burn until it is extinguished.
- Electrosurgery. Similar to electrocautery, it uses a device to pass electricity directly through the skin of the patient to burn the skin. Hyfrecator branding is also called hyfrecator branding.
- Chemical Scarification. A method that removes skin and causes scarring by using corrosive chemicals.
- Electrocautery. Thermal cautery uses a heating element that can reach up to 2000 degrees Fahrenheit in an instant, creating a third-degree burn. A more intricate design can be produced using this method, and curved lines are more easily accomplished.
What to Know Before Getting Scarified
Every scar changes over time, irrespective of the technique. In time, your scars will fade and your skin tone will become closer to your natural one. In contrast to a tattoo, healed scars will always have different appearances, some will be flat and some will be raised. The scars you get from body modifications should heal consistently if you follow four basic principles, says Blair McLean, who practiced scarification for more than 20 years.
A great deal depends on the artist’s skill to determine your scar’s consistency. For a tattoo, several factors—such as the artist’s skill level, the depth of the needle, and the consistency of their work—will take into account how your scars look after healing. Finding an artist whose scarring you can trust and who has been practicing this procedure for some time is important. It will be possible to check their portfolio to see whether scarring is done safely and correctly. Another good sign is an artist who is familiar with the history of the practice since they will be able to provide both a detailed knowledge of the technique and an understanding of its cultural impact.
Finding A Scarification Artist
Before getting scarified, it is important to carefully research scarification artists to find one who is experienced and has a good reputation. It may be necessary to travel a distance to visit a reputable scarification artist since this form of body modification isn’t as widespread as tattoos or piercings, but it’s well worth the effort if you can find one. Consider checking out local tattoos and piercing shops in your area to see if there are any that hire a scarification artist or a piercer who also does scarification. In the case that you are unable to find a scarification artist locally, consider searching in your state or nearby states. Another option would be to search for traveling scarification artists who might be participating in upcoming exhibitions in your neighborhood.
You should search for candidates and look through their portfolios, paying special attention to pictures of fully healed scarifications they have done to ensure the work is of high quality and will heal well. Alternatively, you can also read artist reviews and talk to members of our online community through our forum to see if anyone has recommendations for the artists you are looking at. Make your final decision after talking to two of your top choices for scarification, and then narrow the field to two artists who perform the best scarification work. You may want to consider hiring the scarification artist whose work you enjoy most, whose skills and knowledge you find most supportive of your goals, and who can answer all your questions about scarification and aftercare.
Amplifying Scarification Designs
To obtain a scarification design that is as pronounced as possible, you and your artist can employ a variety of techniques. Scarification methods play a role in the outcome of scarification, so you should talk to your artist before s/he starts working on your scarification piece. Generally, cautery branding, electrosurgical branding, and cutting are the most effective methods of branding. Be sure you like the way your artist’s healing work looks before you proceed. If your chosen artist uses a different method, don’t proceed until you are satisfied.
If your artist uses a scarification method that uses liquid skin adhesive, it may not be possible to fill the scarification design with DermaBond to keep the wounds open and generate more pronounced hypertrophic scarring. If you want a more significant healed scarification pattern, you can also apply an irritant such as toasted sesame oil or antibiotic ointment mixed with granulated sugar on your scarification piece at home during the first 4-10 days of the healing process. If your artist recommends using an irritating technique, you will be able to ask for their recommendation. If you choose to use an irritant at the appropriate stage, always apply it in the same direction in which the cut or burn was created to prevent uneven scarring. You should also wrap your scarification piece with plastic wrap like Precision Medical Cling Film Wrap for the first seven to ten days after getting scarified, and seal it off with medical tape after cleaning the wound. If you do this, your wound will be kept from receiving oxygen and you will be able to slow down the healing process and achieve optimal results. Here are additional suggestions about caring for a new scarification piece we have included in our Scarification Aftercare Tips.
Warnings and Potential Complications
The scarification process can only be dulled by topical anesthetics since only scarification artists practice scarification instead of medical personnel. When it comes to body modification, scarification may not be the best option for people with low pain thresholds. For those with low pain thresholds, applying a topical anesthetic like Dr. Numb or Derma Numb 20-30 minutes before scarification and repeating the application periodically throughout the process can make it much more bearable.
Risky practice, scarification damages the skin during the early healing stages and encourages recurring trauma, which causes the skin to deteriorate. Scarification artists need to be efficient, use sterile tools, wear protective equipment such as masks and gloves, maintain a clean environment, and understand human anatomy to ensure your skin is not damaged beyond what’s necessary to create the piece. The artist could cause harmful results to your visual appearance and possibly put your health at risk if they were to cut or burn your tissue too deeply or for too long. You’ll also need to practice at-home religious scarification aftercare to minimize your chances of developing an infection and to achieve the most even hypertrophic scarring.
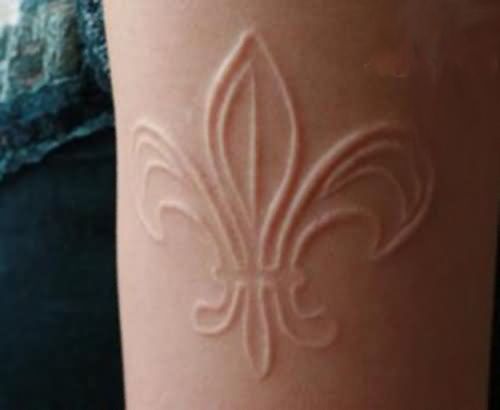
Remember: If you are prone to keloid scarring or you are unsure, but know someone in your immediate family is prone to developing keloids around wounds, be extra careful when getting scarified. By scarification, one can produce controlled hypertrophic (raised) scars according to a set pattern. Hypertrophic scarring heals as fairly skin-tone scarring immediately around wounds, whereas keloid scarring grows out of control, forming a lumpy mound of taut, purplish-red scars that extend well beyond the intended wound site. Keloidal scarring can destroy the scarification design and leave you with unsightly scars that require the help of a dermatologist so that the excess scar tissue can be treated using cryotherapy, laser therapy, surgical removal, or corticosteroid injections. Scarification should not be the only form of body modification avoided by those prone to keloids.
Scarification Aftercare
The second principle is that tattoo aftercare should be almost the opposite of the usual tattoo procedure. The main reason for scarification might be to keep the scar away from possible irritation. However, this may actually lead to the scar being disturbed. It is important for people who don’t want their scars to heal flat that they irritate the wound to ensure that the scar will be raised. In some cases, however, scar tissue will form so thickly during healing that it will not lay flat, making irritation during the healing process unnecessary. Some types of clothing can irritate scars, so they may heal unevenly in areas where their skin is rubbed against them. It is important to apply irritation uniformly to your design so it heals consistently. If you pick at a scar, remember to wash your hands thoroughly and use only safe drugstore products. Most importantly, keep your scar clean! Nothing will make your new design look bad like forgetting to clean it regularly since it can become infected.
Third, consider the placement of scars when having them done. A major component of scarification involves the skin. Different parts of your body react differently to scarification. Depending on the type of skin, it can range from very thin and smooth to very thick and rough. It can be difficult for people who tend to scar easily to get a consistent design if they place it on skin that has inconsistent thickness (i.e. skin that is thick in some places and thin in others). It is generally best to place scars where the skin of the entire area is of equal thickness or roughness.
The final factor to consider when contemplating scarification is your own genetics. The way scars heal on your body is heavily influenced by genetics. If you have a particular genetic makeup or skin tone, your artist may alter their scarification technique to better suit you. When it comes to scarification, it is important to interact directly with your artist and discuss not just the design but how they plan on implementing it as well. It’s all about communication to make sure you are comfortable and that you’re satisfied with the results because every artist is different.
In an informational YouTube video, McLean says that a person’s scarring ability is not always known; they may or may not have previous scars that could aid in identifying their scarring capabilities. It is important that a scar not only looks beautiful to the client and is clear and easy to see years down the road, but it also stays flat or raised.
Immediate Post Scarifciation Aftercare
Bandages need to be changed within the first six to twelve hours after scarification. Here are the steps you should follow:
- Before touching your bandages, make sure your hands are thoroughly clean with a bar of antibacterial soap, then dry them with a clean paper towel. If you can, wear medical gloves as well. It is definitely a good idea for you or anyone helping you to wear gloves.
- You should throw the bandages away after removing them carefully.
- You should first smear some antibacterial soap on your palm. Something like H2Ocean’s Nothing pain-relieving foam soap is ideal because it contains an anesthetic that will relieve the discomfort of washing your scarification wound. By rubbing your hands together and adding a small amount of water, you can lather up the soap and apply it to the scarification wounds in a direction that is in line with where the cut or burn was created. Always avoid using brushes or loofahs to scrub your scarification wounds since these things could cause uneven scarring.
- Lather up your scarification wounds and then thoroughly wash off any soap you used.
- With a clean, fresh cotton towel or paper towel, gently pat your skin dry. Before applying bandages, make sure your skin is dry. (Do not reuse cotton towels before washing them.) Your bandages will stay on properly if your skin is completely dry before proceeding.
- A thin layer of antibiotic ointment should be applied to scarification wounds, such as A&D ointment or a triple antibiotic ointment. In the same way that you applied the soap, also apply the antibiotic ointment in the same direction that the scars were created.
- Don’t wrap your scarification wounds too tightly. Instead, cover them with a thin sheet of plastic film, like Precision Medical Cling Film Wrap. The edges should be sealed off with medical tape. When you bandage your wounds, you keep the area under the plastic wrap moist, which delays the healing process.
Following these steps twice a day will speed up the healing process during the first three days.
Scarification Aftercare After Days 3-10
Scarification should be at this point in the healing process when new tissue is developing. To avoid infection from forming on your scarification wounds as new tissue forms, you should clean them twice a day. Wash your wounds with antibacterial soap by hand, in the direction that the wounds were created. You should not scrub your wounds at this stage with any kind of brush or loofah, since doing so will cause uneven scarring.
After your scarification wounds have been washed and dried, you can begin incorporating an irritant at this point, if your artist recommends it. An irritant will contribute to the production of more scar tissue, which will enhance the appearance of the healed scarification design. Sesame oil that has been toasted is an excellent tool for making healing tissue stronger, while also maintaining moisture. Toasted sesame oil can be used to replace antibiotic ointment before covering scarification wounds with plastic wrap. To make toasted sesame oil comparable to antibiotic ointment, you can add a small amount of sugar to petroleum jelly or antibiotic ointment. If you rub in whatever irritant you use against the grain instead of in the same direction as your wounds, you will support your body’s natural ability to generate smoother, more attractive scars.
When you have finished your twice-daily cleanings, wrap the wounds with plastic wrap and close them with medical tape. Keep your wounds from becoming too swollen, though. Scarification wounds that are sealed off will make your body produce more scar tissue instead of healthy, healthy skin cells.
Scarification Process After the 1st 10 Days
In the first ten days after having your scars scarified, you should discontinue using irritants and bandages. This will allow your wounds to begin to heal and form scabs. Make sure you clean your wounds carefully so as not to disrupt the scabs that have formed. As much as possible, you should avoid bending and move the scabbed area of your body to prevent it from breaking. Also, minimize your movement to prevent the scabs from cracking. Wear loose, comfortable clothing that will not press against or otherwise irritate your scarification piece.
After getting a scarification piece, your body should have produced enough scar tissue to completely cover the wound within six weeks. If you want to enhance your scarring, you can scratch your scarification wounds or irritate them with your hands. Whenever you do this, make sure you do it consistently across all of your scarification designs to ensure uniform scar formation.
Individuals will develop different degrees of scarring because of genetics, but adhering to the guidelines can positively impact the outcome of your healed scarring piece. You can also impact your outcome by how you apply a scarification design. Scarification pieces should not be applied to parts of the body that move constantly, like the knees, elbows, and waistline, since it will be difficult to minimize movement in these areas sufficiently enough to prevent scabs from breaking up during the healing process.
Problems During The Scarification Healing Process
There is always the risk of an infection developing in a scarification piece because it is a wound. When you’re at the highest risk for getting an infection during the early days of the scarification healing process, you may want to ask your physician to prescribe an antibiotic as prophylactic treatment. Keep an eye out for signs of infection if you do not take an antibiotic prophylactically to ensure you can act promptly if you suspect you are getting sick. Symptoms of infection include the appearance of thick, yellow pus instead of blood (the clear fluid that wounds typically secrete after healing that dries to a crust), red streaks radiating from scarification wounds, hot to the touch skin, and fever. When you experience any combination of these symptoms, you should contact your family doctor right away and ask about antibiotics. You should complete the course if prescribed. In that case, a stronger infection will return and become resistant to antibiotic intervention. Do not cut corners when taking antibiotics.
It is also possible to experience skin discoloration around scarification wounds, tenderness, swelling, some bleeding, bruising, and/or itching during the healing process. All of these reactions are part of the natural healing process after trauma. As a preventative measure, you can reduce bruising and swelling by taking acetaminophen (e.g. Tylenol) instead of ibuprofen and applying cold compresses to your bandaged scarification wounds. Before applying an ice pack to your wounds, wrap it in a clean towel, and don’t leave it on for longer than 10 minutes at a time. During the first six weeks, do not scratch the scarification wounds directly if you experience severe itchiness, as doing so may cause uneven scarring. When you scratch your wounds or slap at bandaged wounds, you will relieve the itching.
If you experience any deeply worrying problems, such as excessive swelling or indications of infection, speak to your scarification professional. Your physician may have additional suggestions for you to try to resolve the problem, or he or she may recommend having medical care administered.




I’m in Pittsburgh, can’t find scaring artist locally…. can you recommend someone? Thx. Joe